
Free watercolor painting lesson · Doris Joa
How to Paint the Heidi Klum Rose in Watercolor
Follow a magenta rose from a light pencil drawing through transparent petal washes, sunlit leaves and a softly connected background.
This rose has a wonderful violet pink color. I wanted sunshine to move through the leaves as well as the flower, so I used warm and cool colors throughout the painting.
The beginning
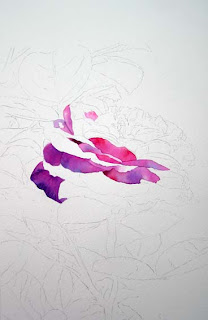
Composition and First Petals
I began with the drawing and a vertical composition. The painting was made on 140 lb cold pressed Lanaquarelle paper, directly on a block without stretching. The rose’s sunlit petals were the main subject, with many leaves to help carry the light around the flower.
I use Permanent Rose and Alizarin Crimson in the warm passages. Purple Magenta is the flower’s local color and appears in both warm and cool areas. Winsor Violet cools the shadows; I add Helio Turquoise where I want a darker, bluer note.

Color choices
Warm and Cool Colors in the Rose
Permanent Rose and Alizarin Crimson.
Purple Magenta and Winsor Violet, with Helio Turquoise in deeper areas.
Alizarin Crimson, Purple Magenta, Winsor Violet and a little Sap Green.
I often let colors mix on the damp paper rather than mixing every shade on the palette. If a dried wash looks different from what I intended, I add another transparent layer and adjust it. That flexibility is part of the pleasure of painting in watercolor.


Sunlight in the leaves
Painting Leaves and Background
For the leaves I used Aureolin, Indian Yellow, Sap Green, Phthalo Green and Helio Turquoise. Touches of Winsor Violet echo the cooler colors in the flower. Some leaves stay light while others move into deep green and blue, creating the feeling of sunlight.
To connect the leaves to the darker background, I wet the area around a leaf and softened its edge with clean water. The wet background wash can then flow gently across that edge. A few crisp edges remain where I want attention; elsewhere they soften and recede.

The last decisions
Why Soft Edges Matter
At the end I photographed the painting and looked at it on a monitor. A few hard leaf edges pulled my eye away from the rose. I softened them with a flat brush and checked the balance again. This small change helped the flower and background feel like one painting.


These process photographs were made while I painted the original work. They show my choices as they happened, including the experiments and adjustments along the way.
Explore More Rose Painting
For the broader principles behind luminous petals and transparent layers, visit my free guide to painting roses. If you would like to paint along with a longer video lesson, explore the Glowing Rose course.
PREMIUM VIDEO LESSONS & E-BOOK
Master the Art of Watercolor

Leave a Reply
Want to join the discussion?Feel free to contribute!