Something about portrait painting and skin tones
Yesterday I did have a visit from a very dear friend, which I have not seen for several years and it was a really wonderful time with her. She also paints and so we spent a lot of time painting and talking about painting. I felt very honored that she wanted to learn something from me.
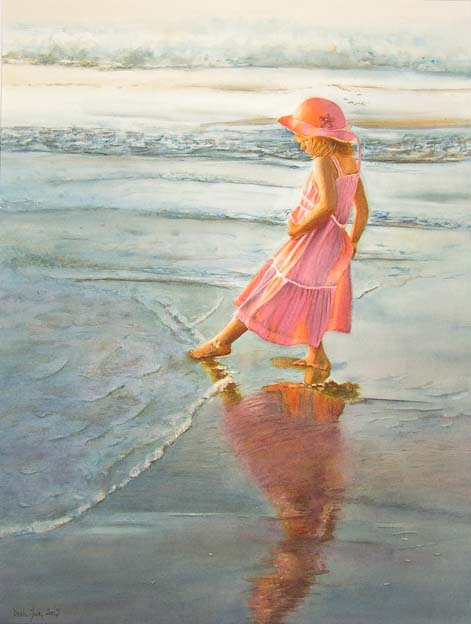
With viewing my figurative work we also came to the Theme Skin Tones and painting faces.
I think there is no really recipe for doing skin tones, because there happens so much on the skin. The skin is transparent and absorbs all what is around. A good base for starting with skin is Raw Sienna, Scarlet Lake and Winsor blue (green shade). And then add the colours which are also on your palette, which you use for your whole painting.
I would like to quote Steve Hanks here. Steve Hanks is the famous figure painter from USA and his work is fantastic. In his book: “Moving on” there was to read:
“Painting skin tones can be very tricky. If you look at your hand you can see there are many colors. You can also see that it is transparent. Notice the colors of the veins coming through it. Artists often ask me what colors I use for my skin tones, but skin is so many colors that there is no one answer. It changes by the light, the objects around it and the ligths and colors that are reflected on to it. Watercolor is also transparent and can be put down in layers, making the skin come alive. Cool tones are most important to be aware of and not left out. They are subtle but critical in giving a figure life.”by Steve Hanks
Skin Tones and Painting Portraits/figures are always a challenge. When I started painting I was happy to create roses and flowers. But I wanted to be challenged and then I did my first portrait. My first portrait was of my daughter Miriam, which is now seen in many of my figurative paintings.
This is my first portrait painting:
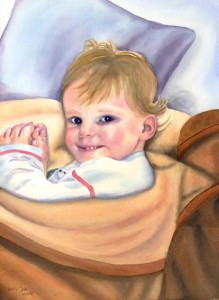
I was very happy with my first result, but I realized that there was so much which I had to learn.
I remember (and I am still very thankful for that), that a fellow portrait artist was kind enough to give me some helpful lessons. I am still so thankful and I would like to share a bit about my “knowledge”, because just with portraits it is so important to make all correct (not to speak from portrait commissions). When painting flowers we can change shapes and forms and nobody will never know this, but when doing a portrait there are so many things important and to know this, will help to figure out, why the likeness is not good or maybe why the painting looks wrong.
I think that the most watercolorists (me too) do paint from photos and also this knowledge will help especially when there is some distortion or when the photo is not good enough to see all perfect.
There are some rules about the facial proportions which are helpful to know:
I have copied the rules from this site on about.com, because their english is much better than mine.
Size of Head: The distance from the chin to the crown is the same as from the back of the head to the front. Features take up only a small portion of the head; a lot of space is needed for the brain! The mid-point of the face, when measured from chin to crown, is at the base of the eyes or eye sockets.
Eyes: The space between the eyes is about the same width as one eye. If the width of eye is used as a unit of measurement, the head is five eyes wide.
(I also have found on another place, that the distance between the two eyes is the distance between the “Eye Whites”.)
(And another important point: The inner of the eye ends in the same line as the nostrils are.)
Eyebrows: Extend beyond the eyes on both sides.
Ears: The top of the ears line up with the brow of the nose and the eyebrows, and the bottom of the ears with the tip of the nose.
Nose: The bottom of the nose is the midpoint between the eyes and the chin.
Mouth: The corners of the mouth align with the center of the eyes (if you’re not smiling). The line where the two lips meet is slightly above the halfway point between the end of the nose and the chin.
Chin: The mound of the chin starts at the inner corners of the eyes
When knowing this we are able to see immediately what is wrong in portraits and it helps so much when we paint our own.
Once we know about this we also can more easily figure out what is going wrong in our work. Another point are often the values.
When painting from a photo I always print my ref.photo in colour AND black and white. The b/w photo helps enormously with the values. When I stuck with my portrait and when I am not happy with it I often do a photo of my painting, load it up in photoshop and make it also black and white, then I compare it to my b/w ref.pic.
For portraits I would highly recommend the book by Roberta Carter Clark: “How to paint living portraits”. It is not only about how to add colour, this artist gives you the basic knowledge about proportions of head and body, values in the face and so much more.
Hope this post was helpful. On my Rosesblog I am working just on a Pink/Deep Violet Rose, so maybe you want to have a look there.



Leave a Reply
Want to join the discussion?Feel free to contribute!